Showing posts with label Floors. Show all posts

Thursday, 14 August 2014

Creaks Be Gone!

On Saturday, while Darryl and his Dad went to pick up our new front door (which won't be installed for months as upstairs is our priority.  We just wanted to make use of the 15% off sale), they also picked up some chip board for new subfloors upstairs.


The original subfloors upstairs were in pretty rough shape.  They were super squeaky and creaky (something I imagined cursing whenever the creaks wake up the baby when we walk around up there in my imagination).  They also had several sections which had broken off leaving gaps in the floors which isn't the safest or best. 


You can get the general idea of how they looked before, or here's a fuller picture of the subfloors on the main floor from when we did that reno a few years ago.


 photo IMG_7971_zps2d0ec78d.jpg

Sadly, I didn't get any pictures of the holes in the floor.  They started installing the chip board before I got home for the day and even realized they were going to.

So, on Saturday, instead of tackling the electrical as planned, they installed the subfloors in the nursery which felt like we were taking a step back a bit (as we were debating whether or not to even put new subfloors in).  It's going to add on to our timeline quite a bit, but in the end it is for the best.


 photo IMG-20140809-00453_zpsd549324f.jpg


 photo IMG-20140809-00454_zpse3cc67d1.jpg


So now when we walk in there, it no longer creaks and there is no fear of stepping on the wrong weak board and falling through to the main floor. 


Here's what's left for us to do before we can set the nursery up:

* Finish electrical in the hallway
* Drywall the hallway
* Mud the hallway
* Sand the hallway
* Prime the hallway
* Paint the hallway
* Take hallway floors up
* Remove all nails from the hallway floor
* Install new subfloors in the hallway
* Install new bamboo floors in the hallway
* Install new subfloors in the nursery
* Install new bamboo floors in the nursery


I should probably stop looking at this list.  It's very daunting and stressful and I cannot imagine how we're going to get it all done in time.


Anyone else stressing about projects and deadlines!?

Monday, 5 December 2011

Boards on the Base

So this weekend we got a few big visual changes done downstairs.  One of them was having our baseboards put up!  Wow, it's crazy how much of a visual impact they make.  They make a room look so polished and finished.  We gave them our full attention on Saturday.  While Darryl made all the cuts and nailed them in (using his new and uber fast Brad Nailer), I would follow him along and fill in all the nail holes and seams.  We got them all attached on Saturday, and on Sunday morning I went back and sanded the filled holes down.  Then I went back around the room and vaccumed up all the dust.  Then I went back around the third time and painted the little patches up.  (They still need a second coat of paint so, technically, they're not done, done.  But with everything else we got done yesterday, I didn't have time to paint again).

Here's a reminder of what the room looked like without baseboards...


And then after lots of painting like this...


Our room is now looking something a little more like this...


(you can see the white haze where the trim meets the wall from some DAP we used, I'll touch that up with paint...sometime)


We are so happy with how it all turned out!  They have a fairly simple profile, but they're just like they would have been 90 years ago and that was our goal.  We love the stream-lined look they have.  The room is actually feeling finished, and like a room again instead of a renovation site.  We're hoping to move our tv back down sometime this week so that we will be fully functioning downstairs again!

I'll be back this week with some kitchen updates, and to show you what else we got done on Sunday.

What did you get up to this weekend?

Wednesday, 30 November 2011

Baseboards

Over the last couple of days we've been working on some more finishing touches from our to-do list.  We've started the process of re-creating baseboards to match the originals (the majority of the original 7 and 3/4 inch baseboards had been removed and replaced by tiny 3 inch ones).  We love those little touches of character that the house has so it was important for us to try to restore the baseboards as best we could.  And what we couldn't restore, we would try to replicate. 

Here's some of the trim when we moved in (original)


And some of the much shorter, new trim that they had replaced...boo


We took a trip to a near by lumber store, Peacock Lumber, to price out how much it would cost for them to cut some matching trim.  We brought a piece of the original with us and they confirmed that it was made out of mahogany.  I'm told that new mahogany has nothing on the old stuff which is much more dense.  Either way, mahogany was not in our budget.  Especially since we plan to paint all of the trim white, we're not so concerned with keeping the type of wood the same.  They quoted us $90 for 20 feet of trim.  We would need quite a bit more than that and we weren't overly keen on the price tag that would add up to.

So we headed to Home Depot to price out some MDF.  For a 4x8 sheet of 3/4 inch thick MDF (same thickness as the originals) it would be $35 + tax.  Once we cut a board that size up it would give us 48 feet!  With our previous discussion of being careful not to over-renovate in mind, we knew this was the right fit for us.

Luckily (in terms of having to replicate them) the original baseboards have a very basic profile and Darryl and his dad knocked all 48 feet of them out in under 10mins

We had Home Depot cut the big boards into 7 1/2 inch planks


When we got the pieces home Darryl was ready to kick some baseboard butt


All done the cuts...


Then I gave them a quick sand-by-hand.....then realized that wasn't good enough so the next day I tackled them again with the power tools.  Then I brought them in, set them up in assembly line fashion and started to prime and paint over a couple of days...


Sorry for the dark picture...


Right now, the living/dining room is still looking like this, but we're hoping to be able to start putting some baseboards up on the weekend so that we can make room to set up Karl's Dad.  We're eager to have him put together!

Are you getting any finishing touches done?  Tackling anything on your to-do list?  Ever tried to replicate something original?

Thursday, 24 November 2011

Kitchen Floors Revealed

Alright!  So after a little sneaky peaky yesterday I'm back to show you how the kitchen floors turned out.  With yesterday's disclaimer in mind, are these our dream floors?  No.  Do we love them anyways?  Absolutely!  Should we get a return on our investment?  We sure hope so!

We left off at the point where we were trying to decide on which way to lay the tiles...


We decided on the brick pattern for a couple of reasons...

1.  We just plain like it!
2.  It adds a little more (free) visual interest, rather than just laying them side by side (like the bottom 3 tiles in the first picture)
3.  We hoped that this pattern would trick the eye into seeing a slightly wider kitchen once the cabinets were installed (I'll explain further once I get the cabinet post up)
4.  Having straight grid-like grout lines makes it a lot easier for the eye to pick up on imperfections, as opposed to the brick pattern that breaks it up

Here we are laying the very first tile and being oh-so-happy about it!


Once Darryl had done a few rows (while my job was again to mix up the thinset so that he had an ongoing supply), we got into a nice rhythm.  Darryl would prepare the thinset on the floor and I would back-butter a bunch of tiles and lay them out for him so that he wouldn't be slowed down by having to do that as well. 


(we left the trickier cuts - the parts around the perimeter - until the end)


This has been, by far, the most back breaking work of this entire main floor project.  We were both dying by the end - our backs from bending over all day, our knees from kneeling, our necks from looking down for hours on end and Darryl's wrists from all the thinset spreading.  The pain!  We have definitely gained an exorbitant amount of respect for people who earn their livelihood from laying tile.  Whew!  

Once the tile was all set over the course of two 12 hour days and one 6 hour day, all that was left was to grout the tile.  I found that the grout we chose, turned out nothing like the sample and I was extremely frustrated.  Now I'm okay with it.  It's just grout, right?  It's not the main focus. 


(I realized I never took "after" shots!  So I took these pics this morning which is why you can only see part of the floor but once the kitchen is revealed next week you'll be able to see it all)


So this upgrade cost us all of $230!  It's crazy how much you can save when you're not paying for anyone else's labour.  We bought the tiles while they were on sale and they came to $181 (with a few boxes left over) and the rest of the cost was for the mesh, mortar, thinset, grout and sealer.  Woot!

ps.  Check out the updates, cover plates have been put on all the plugs and light switches!

Have you laid tile before?  If so, would you do it again?  Or is it a job you'd rather leave to the pros?


Wednesday, 23 November 2011

Kitchen Floors - Weighing the Options

I've been slacking on the kitchen updates, so here we go.  In August (a full year after we started demo) we tackled the new kitchen floors.  I have to put a bit of a disclaimer in here if we're being honest.  Darryl and I bought this house strictly as an investment and as a way to enter the housing market.  We know that this isn't our "forever" house.  We are both contracted employees desperately waiting for permanent positions, so we didn't have a lot of area to move in terms of mortgage approval.  For this reason, we bought a house in an "up and coming area", which translates to "pretty rough around the edges". 

With all of that in mind, we have been extremely aware of not "over-renovating" the house.  All those HGTV reno shows we're addicted to have taught us that, if nothing else.  We want to be sure to see the return on our investments, which means picking nothing in the high-end categories.  You know how they always say you don't want to have the best house on the street when it comes to resale (of course, you do if you're planning to stay long term though)?  So most of the finishings we chose are fairly basic because they bring the house a long way from where it was, but will still ensure we see a return when we sell. 

With that said, the kitchen floors...

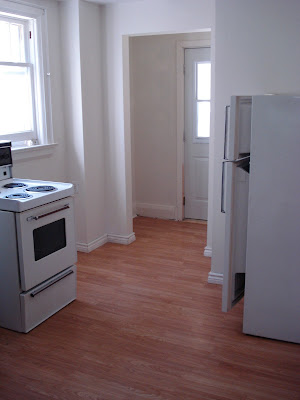
Here's a reminder of what they used to be.  (They photograph much better than they were for some reason.  They were extremely cheap laminate that was poorly installed, chipped and beaten up)


I don't seem to have pictures of us taking up the kitchen floors - the laminate you see above was easy peasy to take up, but underneath were layers of vinyl and then a layer of 1/4 inch poplar underlay and then 3/4 inch tongue and groove pine subfloors.  If only there were a way to describe just how many nails we had to pull up.  No wonder I didn't take any pictures of the process, I didn't want to be reminded.

Needless to say, we lay a new subfloor which you can see in the picture below.  So in August, we decided to tackle the tile.  Something neither of us had done before but felt confident that we could attempt.  My job was to staple the metal mesh to the subfloor.  (If you're about to do this I suggest you wear more clothing than I did, that stuff is sharp!)


Hold your gasps of horror!  Yes, we know this isn't the most modern underlay (aka Ditra).  But it's the underlay that they've used for decades and decades.  It is way more labour intensive which is a big reason why it's not as popular as Ditra, but we weren't paying anyone for their labour and so we thought it would be worth it to suffer through it.  It is drastically cheaper than the orange stuff and, while it's not for everyone, with my disclaimer from the beginning it was right up our alley.


(Ditra)

I was sure to match each new piece of mesh up perfectly with the last to ensure that they were completely flush.  We couldn't have any variations in height or it would weaken the final product.  Same goes for the staples, I made sure they were all well sunk in the floor.


Once I was done my job, Darryl came in for his.  He laid a mortar/parge coat into the cement.


To make the process go faster, while Darryl was spreading the mix, I went outside and mixed up his next batch of mortar so that he could just keep moving along.


Once this part was all done, we had to leave it untouched, unwalked upon, for 24 hours.


The next day, we noticed the front entrance was still unlevel - it's hard to ask for perfect floors from a 91 year old house, so you can see the big circle area where Darryl added some more mixture the next day to better level it.


Another 24 hours later we started laying chalk lines as guides to be sure we were laying the tiles straight.  Then we fiddled with a few different ways of laying tiles (brick style, or just one beside the other, you can see the two different types below)


So there's a sneak-peak to the tiles, they're obviously a very basic ceramic tile, but they're neutral and miles better than they were.  We carried the tile into the main floor bathroom and into the front entrance as well.

Tomorrow I'll show you how it all turned out, which layout we chose and how much it all cost!

When you do renovations how do you pick your finishes?  Do you take into consideration whether it is your "forever house" and what is best for your return on investment?  Do you pick finishes that you love, regardless of the price tag?


Friday, 21 October 2011

Hello Pretty Floors!

I cannot describe how wonderful it is to walk on clean floors.  Yes, that is a luxury in this house.  Our old floors were gummy and dirty no matter how much I cleaned them and would discolour your feet!  Now our floors are smooth, gum-less, and I can walk around barefoot again, woot!  Putting in new subfloors involved picking up about 12 sheets of OSB (Oriented Strand Board) and screwing it to the old subfloor.  We staggered the way we layed each sheet to make for a stronger floor.  We went from the old subfloor...


To the new subfloor...


We had shopped around for flooring and sales for a while and finally came across some floating bamboo floors that were $1.99/sq ft on clearance.  And with a couple Home Depot Gift Certificates we could put towards it, that was a deal we were pretty happy with!  We really wanted to get bamboo for their sustainability.  We also had to buy the foam padding that they suggest you put under a floating floor. 

When it came to choosing the stain, we knew we didn't want a stain that would be too trendy (ex. something on either end of the dark/light scale).  Even though we love the look of really dark floors, and also saw some neat "ghost" bamboo floors, we opted for something a little more traditional.  It fit with the house more and we hope that they will have more longevity. 

Laying the first row of boards was the most important and time consuming.  It was essential to measure and measure again, to make sure everything was level and straight.  It was also the most time consuming because there were a few cut-outs to make.


After the first row was put down, installation was super easy.  The only cuts that had to be made were the excess pieces on either end of the row, and also around the heating vents.  I like to think we work well as a team - so our strategy was for me lay out a row, making sure each piece was staggered in an aesthetically pleasing way, and Darryl would follow behind me, clicking/ramming them into place. 

So for the weekend, I'll leave you with our new floors...


I'm going to keep it real with you, that's what the floors still look like, with that same pile of leftover bamboo in that same exact spot.  We've since moved onto other projects and have somehow neglected to put the excess away....we'll get to it....

Enjoy your weekend - any exciting plans?!

Thursday, 20 October 2011

Ever Wonder What's Under Your Floors?

So the floor demo began and this was all on Darryl.  I stayed upstairs and pretended it wasn't happening.  The good thing is that we saved a whole bunch of the wood in case we need to replace anything upstairs.  Here he is preparing for the job...


He started demo later in the day, so he completed it over the course of two days.  He used a crowbar to pull the boards up.  Under the wood was a layer of wax paper.  After getting one half of the room pulled up, he had to go back and pull out the gazillions of little nails that didn't come out with the wood.


Before taking the paper layer up, he swept up.  Look what was under the floors...


How does that much dirt get under there??  Shocking.  Finally, he pulled up the paper stuff and we were left with the subfloor exposed.


You can see in the left side of the picture, that triangle hole, where the subfloor had cracked and fallen into the basement.  So we were definitely in need of some new subfloors - which I'll share with you tomorrow!

Have you taken up any floors?  Did you find anything underneath them?