Wednesday, 12 October 2011

Taking Back Our Dining Room

I realize that demo definitely isn't the most fun or glamourous part of renos, but as this blog is serving as a bit of a diary for us to remember every little step of the way, I've got to get all my thoughts out.  More exciting and pretty stuff to come though, hang tight!

As I mentioned in yesterday's post, when we bought our house, the dining room's original entryways had been dyrwalled over to turn it into a bedroom.  In order to faciliate a duplex, they also had to find a place to put in a bathroom on the main floor.  I guess they did the best they could with the given space, but stradling a bathroom between a kitchen and a dining room was not our ideal layout.  It meant that we had an "L" shaped dining room...


Not the best picture, but it's really the closest one to showing the footprint of the dining room (where the boys are).  What they're about to take down is the shower part of the bathroom, that was never there when the house was originally built.

I have yet to come across an easy, straight forward, online floor planner, so I decided to just draw the main floor out quickly to give a better impression of the bathroom situation...


So we tore that whole bathroom out and relocated it to a different spot on the main floor, converting it to a powder room.  More on that in the coming weeks!


While I don't have after shots yet of a full on dining room, we've at least got the full shape and size back to work with.  Woot!  In the first picture from this post, you can see the dining room only had one of these two windows, the left side was part of the bathroom before, now we have both back.


And for a different perspective, looking from the kitchen into the bathroom before...


And during demo, now we can see the dining room...


So now that we had this gaping hole (where we knew our fridge would eventually go), we framed up a new wall...


So yay to gaining our whole dining room footprint back!  Check back tomorrow and Friday to see the walls going back up!  Then next week we'll take a look at the floors  :)

Do you have a favourite online floor planning site?  Any tips?

Tuesday, 11 October 2011

Demo Discoveries!

I hope you all had a wonderful Thanksgiving weekend!  We had a lovely family dinner with lots of laughter, delicious food and great stories.  And are you loving my new header as much as I am?  When Britt offered to give me a hand adding a little oompf to my blog I was over the moon!  I couldn't believe how fast and helpful she was...thanks Britt!  Check out her pink peacock designs link on my sidebar as well :)

To help organize my thoughts I'm going to focus on the living/dining room first, so I'll take you from demo and soon to where we are today!  Then I'll show the kitchen afterwards.  Sometimes I'm a bit of a linear thinker.  From the minute we started tearing things down, I hoped and prayed that we would find some super cool time capsule from owners before us, or some love note that slipped behind a baseboard and was forgotten for decades.  And while we didn't find anything like that in the living room, there were still a few neat discoveries that told us a bit more about our house and what it was originally like. 

Old windows have counterweights in them to keep the windows open.  The weights hang on a rope and after years of opening and closing, the rope often frays and the weights drop, leaving you with windows that can no longer stay open on their own.  After taking the trim off our windows we uncovered the weights (7lbs each!)


(I am determined to find a use for, or a way to display, these original cast iron weights, but I'm having trouble coming up with ideas so if anyone has seen something or just has an idea I'd be happy to hear!)

After taking down a wall in the dining room we uncovered original electrical boxes for wall sconces.  That little circle thing on the wall is the original box, the other one is hiding behind the door leaning on the wall.  So we updated the electrical so that we could bring the sconces back!   Who would hide a treasure like that!?


Taking off the baseboards uncovered some green shag carpet that was in the house I'm guessing in the 70s??


Yummy.


Of course there was knob and tube wiring which had been updated before we bought the house


We also uncovered 3 original doorways which had all been covered up in order to create separate living areas for the duplex.  The red lines outline the original doorways we found.  I was adamant that should we uncover any pocket doors we would keep and restore them.  Unfortunately there were none to be found  :(  This first one was the doorway into the front entrance from the living room.


Below, the green painter's tape shows the doorway that previous owners added in after closing the original ones off.  The red line shows the doorway from the dining room into the kitchen.


And then we found the doorway in between the living and dining rooms.  In the pic below, the door on the left is the door the other owners put in to turn the dining room into a bedroom.  The middle larger opening is the original opening, which had we found pocket doors (as neighbours on either side of us have) we would have restored it.  But there weren't any so we opted for a more open flow.  On the wall on the right you can also see both the sconce electrical boxes.


We were lucky to have a very generous friend offer to help one evening with the demo.  He definitely helped give us our second wind.  That thing they're knocking down is the shower/tub area of a bathroom that had been put in.  I'll have to draw up some floor plans to show you because it's a little hard to explain.  The bathroom straddled the kitchen and the dining room.  Awk-ward. 

Finally, the little black thing on the bottom of the staircase is the original telephone hook up, which I think is sooo so cute.  I can just picture the old fashioned phone and telephone table that would have sat in the entry way.  So romantic.


What I learned:  Even though I found out that I seriously dislike the demo phase, I LOVE discovering all of secrets an old house can hold.

Did your demo unveil anything interesting?  Any thoughts on how I can incorporate the cast iron weights into our home??

Saturday, 8 October 2011

Happy Thanksgiving!

For all the Canadians out there, Thanksgiving weekend is here and I came across this wonderful idea from YHL.  I'm sure you all know them, but if not, check them out, you don't know what you're missing!  They're so thoughtful and creative with so many great ideas! 

So although we're starting a bit late, I thought it would be a really nice thing to try this year.  Each day we write something we're thankful for on a slip of paper and put it in a jar, not knowing what the other person writes.  When the month is done we'll read them together.  Afterwards I think I'll put all the papers aside for Christmas time.  Then I plan to put them in a clear glass ornament for the Christmas tree (yes my mind is there already), label the year on it, and that way each year we can reminisce about all the years we have collected!

I went to Michaels and picked up 3 fall coloured papers in green, orange and brown for a dollar each. 


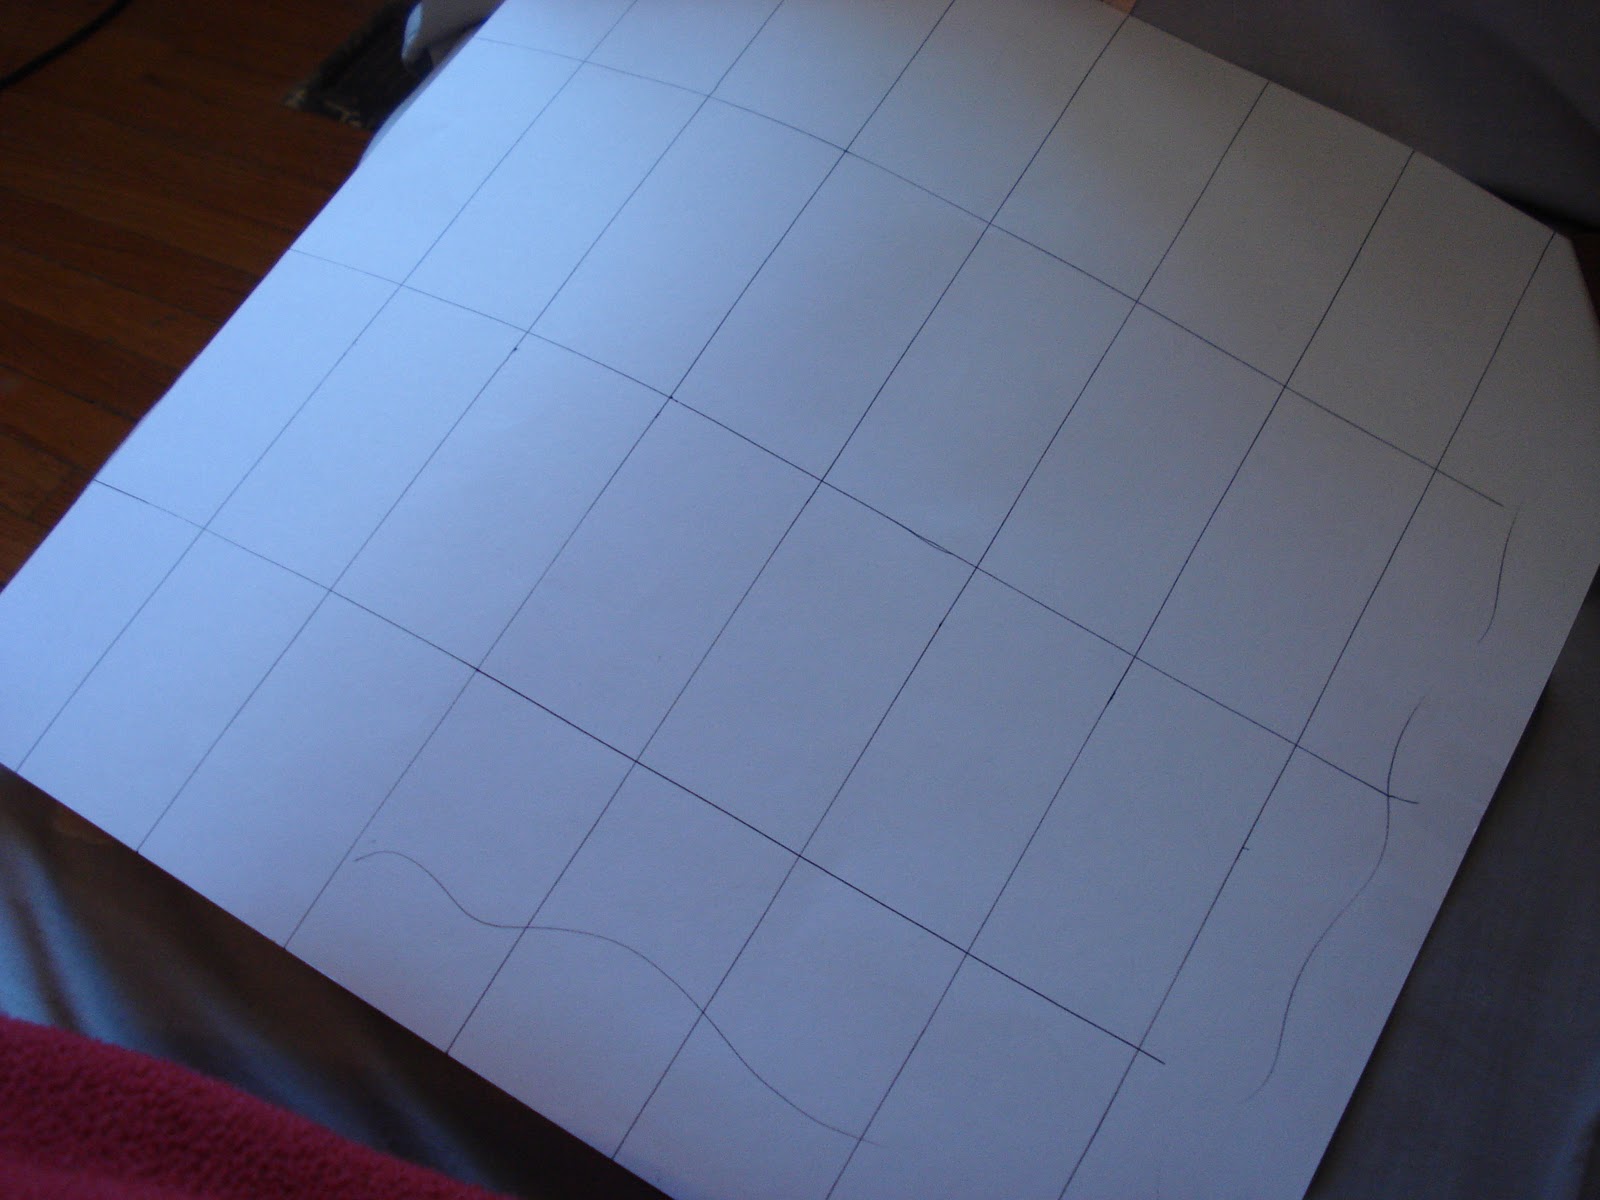
When I got home I decided that I didn't want the papers to be very big so I decided on 1.5 x 3 inch rectangles. I measured out a grid and got to cutting with my super fancy scissors! Cutting is always more fun with patterned scissors. 


I grabbed a glass jar I had on hand (left over from my sister's wedding centre pieces, thanks K!), gave it a quick wash and a couple coats of Rustoleum's Frosted Glass spray paint.  I put some letter stickers on it saying "thanks".  Easy peasy!


I hope you all have a wonderful Thanksgiving weekend if and however you celebrate it!

PS.  I hope to have a new header to share with you on Monday  :)

Do you have any special Thanksgiving traditions?  Any fun crafts?

Thursday, 6 October 2011

The Demo Begins...

We lived in our house for about 10 months before we decided to take the big step and demo the main floor.  That was a bit of a scary day if I'm honest.  Once we took the first swing it was like there's no turning back now....go big or go home! 


One of the things we learned very quickly, within the first few days, was that when you're doing a renovation for the first time, and you're doing it on your own, things seem to take waaaay longer than you anticipated.  Initially we thought oh yeah, we can demo this in a day or two....HA.  HA!  I can't even remember how long it took us, this phase was over a year ago now, but it definitely was not a day or two.  Although we knew we had lath and plaster walls, we didn't think the details through, that taking these walls down was like taking them down two times.  Once to get the plaster off (Darryl discovered after a bit that using a small, flat shovel worked best for him) and a second time to take the lath off (and then going around and taking all the teeny tiny nails out that didn't come out with the lath.  Job.and.a.half.)


We used pry bars to take the lath off.  If you're about to under take a job like this, be sure to have the proper masks, the thin, white ones won't do the job.  Hard hats were also important with things like the ceiling coming down.  Here's a closer look at the main reason we decided to take on this demo:


Behind the plaster and then the lath, what do you see?  That's right....nothing.  The walls were 100% empty.  Yikes!  So when the goverment was offering the Eco Energy Audit Rebates, we decided it was the perfect time.  If we were going to do all of this, we might as well be reimbursed for all we could qualify for (things like updating windows, increasing your R value in terms of insulation, Energy Star toilets...).

I'm not going to lie, the first few days of this were hard for me.  I'm not one to always enjoy change, I often like to keep things as they are.  This house is 91 years old, someone 91 years ago put this baby together and now we were going to take it apart??  Horror!  But the reality was that the house had already been so butchered and reconfigured by previous owners and landlords that I started to see it as my turn to make those things better.  I may be more emotional than is probably good for me  :S

More on the demo next week!


On another note, yesterday Darryl grabbed an original clawfoot tub from a neighbour a couple doors down who was going to throw it out!  Our house already has a clawfoot, but it is in desperate need of repair, so we're thinking maybe we'll use it as a tester before we try refinishing our own.  After seeing this kit at Little Old House I think we'll definitely try it!  It may be a while before we get to it, but it was free and we couldn't pass it up!

Do you or any one you know have experience refinishing cast iron tubs or sinks?  Any advice??

Wednesday, 5 October 2011

Doily Webs for Halloween in 5 Easy Steps

Thank you to all who popped on over yesterday after my guest post at First Time Fancy, and for all your welcoming and encouraging comments!  It was great to hear from bloggers that I've been following for a while, as well as to meet some new ones!

Last week I was rifling through some magazines at the check out at Home Depot and I came across a cute and easy Halloween craft. 


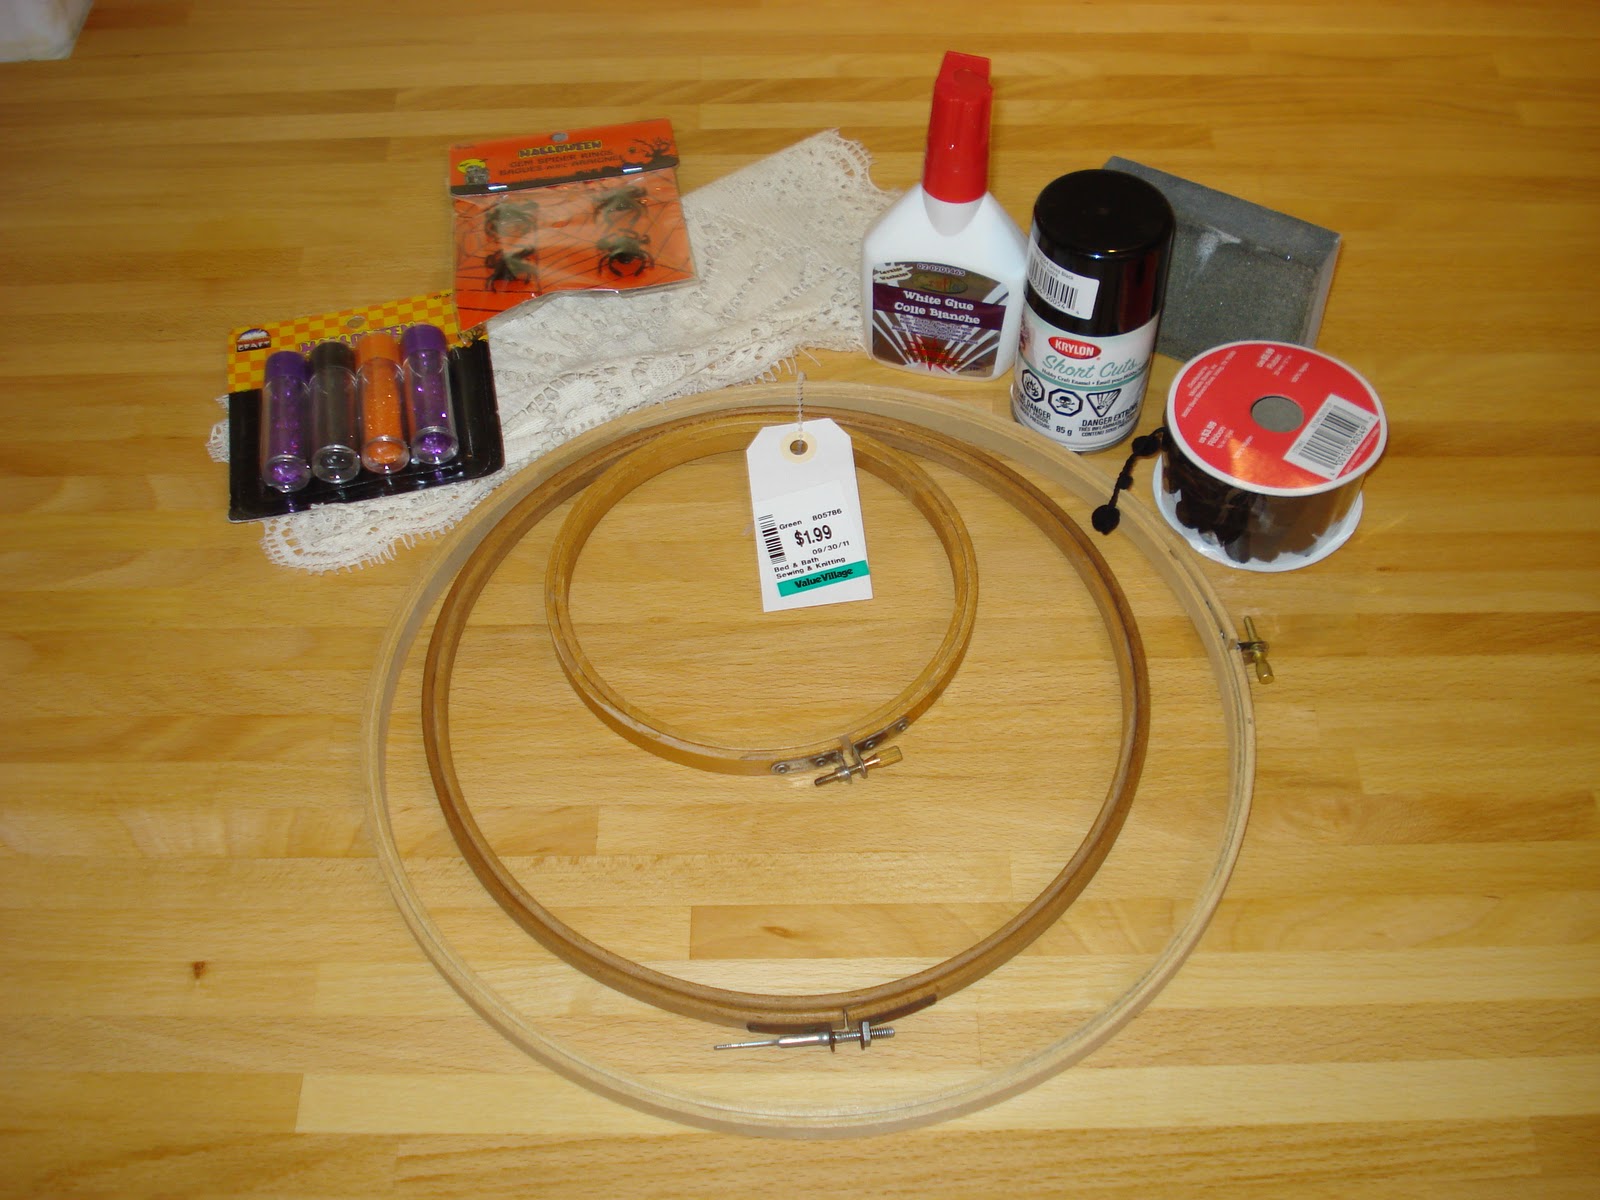
I logged it in my mental files and this weekend I set out to get the few materials I needed.  Here is everything I needed (I didn't end up using the sparkles in the end)


- Sand paper/block
- Cross stitch hoops (I got this set of three from Value Village all for $1.99)
- I scored 12 doilies from another local thrift shope all for $3!!   I only used 3 for this project but I have plans for the others
- Dollarama spiders for $2 (I only used 3 of the 8 I got so I'll have to think of some more crafts for the left overs)
- Black spray paint $4.99 and it was 40% off on top of that with a coupon I had for Michaels - I never go to that store without a coupon
- Pompom string marked down to $1 at Michaels
- Glue $1

And here's how...


Step 1: I gave the hoops a light sand just because I have texture issues and don't like the snaggly prickling feeling that wood can sometimes have.

Step 2: Give the hoops a few coats of black spray paint (or any other colour really, I thought about a deep purple for a bit but decided against it in the end).  I covered the pins that tighten the hoops at the top with saran wrap, because I didn't have tape on hand.  I did that because I didn't want the pins to have trouble opening or closing from tacky paint.


Darryl put a few nails for me to hang the hoops on for spraying.  And as this part of our house is clearly not a keeper, we didn't mind getting paint on it.


Step 3 (optional): While my paint was drying I threw the doilies in the wash on the handwash cycle because I don't prefer Eau de Old-Lady-Powder as a fragrance in general.  If this scent floats your boat or brings back some nostalgic memories, just skip this step.  My Nana does not smell like this so I went for the wash.

Step 4: Once your paint is dry, loosen the pin at the top to take the outer ring off completely or just to loosen it, whichever you prefer.  Lay your doily over the inside hoop and centre the pattern.  Place the outer hoop over the doily and push it down so that the 2 hoops are now flush.  Before you tighten the pin, gently pull any loose pieces.  When you're happy with the placement tighten the pin.  Trim the excess material.

Step 5: Use ribbon or string, or even fishing line if you want them to look like they're floating.  I was going to use black ribbon, but once I saw the pompomed string I liked the extra texture and interest it gave.  Whichever you choose, tie it to the pin on the hoop.  You could glue gun it on too but I wanted to be able to take them off and adjust their length from time to time.  Finish it off with a spider on it and you're done!  Again you could glue the spiders on, but I just tucked their legs through the holes in the doilies so that I can move them or change them up if I like.

Sorry for the lack of pics in the last couple of steps, once I got started, I got carried away and before I knew it, I had them hanging on my windows with not a picture in sight.  But here's a few with them all done...


and at night...


And there you go, very little materials, no time at all and you get a cute little window or wall display for Halloween!  And even better was Darryl's reaction when he came home and saw them.  He really likes them.  Once the hoops were painted and dried, it took less than 10 minutes to assemble the hoops and have them hanging in my window.


Total Cost: $10 for three pieces with so many left overs for future projects.  I'm happy with that!

Are you getting your Halloween craft/decor on yet?  I can't help myself as soon as October hits.

Tuesday, 4 October 2011

Guest Posting at First Time Fancy

Today I'm guest posting for Kerry at First Time Fancy.  Based in Toronto, she has a wonderful blog detailing her home improvements, her favourite web finds and her brand new baby, Halle.  Definitely check her out if you haven't already!  http://www.first-time-fancy.blogspot.com/


And a little sneak peak for a Halloween craft I'll be sharing tomorrow...


Come back to see the whole thing tomorrow!

Monday, 3 October 2011

Jack of All Trades

A little deviation from the usual reno posts.  But this does involve a minor, but crucial, aspect of home improvement for us.   Last weekend I was on my own while Darryl went on an end-of-season camping trip (though I missed out on the trip, I was super excited to start a new dance class I sign up for through Groupon, I'm such a nerd like that, and to attend a going away party for my cousin who's moving to Europe for a year). 

When I'm home alone I sleep with my bedroom door locked.  It's the only way I can sleep soundly, knowing that even if someone were to get in the house, at least they can't get to me through my super steel fire door that's still in the house from its duplex days.  I can't be the only person who incessantly envisions home invasions while home alone, right??


Darryl being mean, taking pictures of me while I'm all vulnerable.  He thinks it's funny when I put toothpaste on my "blemishes" to dry them out...anyone else with me??  haha


Anyways, having survived the night from a potential home invasion, I woke up and puttered around the house leaving my bedroom door open as I always do.  But my parents were coming over in the afternoon and so I closed the door to hide the disaster that our room, and entire upstairs if I'm honest, has become.  Ever since we demolished our main floor we've had to migrate upstairs, putting in a temporary kitchen in one bedroom and living room in another.  It is next to impossible to keep on top of all the dust that constantly reappears. 

After shutting my door I had forgotten to put a few things away, only to notice that I had LOCKED MYSELF OUT!!!!  This wouldn't be such a big deal had my doorlock been one of those standard push-button locks that I could always break into using a wire hanger when my sister was dillydallying back in the day at our parents' house.  No no, we had to leave the fire door on and not change the locks when we moved in.  So I panicked and called Darryl at his campsite to which he replied that he would either have to break through the window, and subsequently add buying and installing a new window to our to-do list, or put a hole through a neighbouring wall!  Enter Mum and Dad...who so calmly asked "why don't you just call a locksmith?"  Hadn't occured to either of us in our panic haha. 

Long story short, when he got home he ended up breaking into the room using a gift card!  (Sometimes home improvement isn't always what you planned or imagined)


I thought that was only done in movies!


While I was so ecstatic at not having to pay nearly 100$ for my stupid mistake, I now have a whole new set of worries when I'm home alone, knowing that a measly gift card can do the trick!

I love my Jack of All Trades.