I've been slacking on the kitchen updates, so here we go. In August (a full year after we started demo) we tackled the new kitchen floors. I have to put a bit of a disclaimer in here if we're being honest. Darryl and I bought this house strictly as an investment and as a way to enter the housing market. We know that this isn't our "forever" house. We are both contracted employees desperately waiting for permanent positions, so we didn't have a lot of area to move in terms of mortgage approval. For this reason, we bought a house in an "up and coming area", which translates to "pretty rough around the edges".
With all of that in mind, we have been extremely aware of not "over-renovating" the house. All those HGTV reno shows we're addicted to have taught us that, if nothing else. We want to be sure to see the return on our investments, which means picking nothing in the high-end categories. You know how they always say you don't want to have the best house on the street when it comes to resale (of course, you do if you're planning to stay long term though)? So most of the finishings we chose are fairly basic because they bring the house a long way from where it was, but will still ensure we see a return when we sell.
With that said, the kitchen floors...
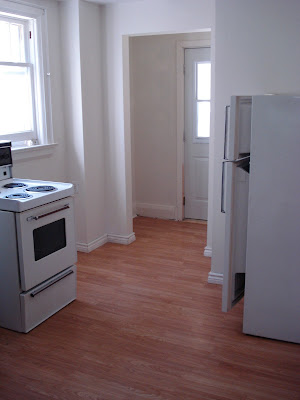
Here's a reminder of what they
used to be. (They photograph much better than they were for some reason. They were extremely cheap laminate that was poorly installed, chipped and beaten up)
I don't seem to have pictures of us taking up the kitchen floors - the laminate you see above was easy peasy to take up, but underneath were layers of vinyl and then a layer of 1/4 inch poplar underlay and then 3/4 inch tongue and groove pine subfloors. If only there were a way to describe just how many nails we had to pull up. No wonder I didn't take any pictures of the process, I didn't want to be reminded.
Needless to say, we lay a new subfloor which you can see in the picture below. So in August, we decided to tackle the tile. Something neither of us had done before but felt confident that we could attempt. My job was to staple the metal mesh to the subfloor. (If you're about to do this I suggest you wear more clothing than I did, that stuff is sharp!)
Hold your gasps of horror! Yes, we know this isn't the most modern underlay (aka Ditra). But it's the underlay that they've used for decades and decades. It is way more labour intensive which is a big reason why it's not as popular as Ditra, but we weren't paying anyone for their labour and so we thought it would be worth it to suffer through it. It is drastically cheaper than the orange stuff and, while it's not for everyone, with my disclaimer from the beginning it was right up our alley.
(Ditra)
I was sure to match each new piece of mesh up perfectly with the last to ensure that they were completely flush. We couldn't have any variations in height or it would weaken the final product. Same goes for the staples, I made sure they were all well sunk in the floor.
Once I was done my job, Darryl came in for his. He laid a mortar/parge coat into the cement.
To make the process go faster, while Darryl was spreading the mix, I went outside and mixed up his next batch of mortar so that he could just keep moving along.
Once this part was all done, we had to leave it untouched, unwalked upon, for 24 hours.
The next day, we noticed the front entrance was still unlevel - it's hard to ask for perfect floors from a 91 year old house, so you can see the big circle area where Darryl added some more mixture the next day to better level it.
Another 24 hours later we started laying chalk lines as guides to be sure we were laying the tiles straight. Then we fiddled with a few different ways of laying tiles (brick style, or just one beside the other, you can see the two different types below)
So there's a sneak-peak to the tiles, they're obviously a very basic ceramic tile, but they're neutral and miles better than they were. We carried the tile into the main floor bathroom and into the front entrance as well.
Tomorrow I'll show you how it all turned out, which layout we chose and how much it all cost!
When you do renovations how do you pick your finishes? Do you take into consideration whether it is your "forever house" and what is best for your return on investment? Do you pick finishes that you love, regardless of the price tag?


