I started by giving the legs and sides a light sand
A couple of the legs were wobbly so I grabbed a screw driver and tightened them up
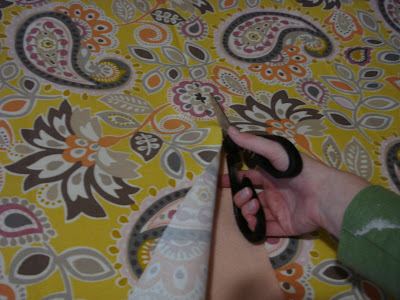
The fabric was quite large so I cut it in half so that it would be easier to iron the creases out
Then I took the benches outside and gave them 3 thin coats of Rustoleum's Heirloom White spray paint
I let them dry and off-gas a bit outside for a day or so. Using spray adhesive I stuck the foam to the benches.
I cut the batting to size and used a staple gun to attach it to the soon-to-be bench.
Next I draped the fabric on top and fiddled around until I found a placement that I was happy with
Then I very carefull flipped the bench back upside down and put one staple in the middle of every side, so that each side looked like this
This was just so that I could flip it rightside up to make sure the pattern had stayed in place, before I committed to stapling a gazillion staples in because boy is that a task and a half! My hands were left red and raw. I don't know if it's because of our staple gun or if it's due to the density of the wood, but at points I was using both my arms and legs in some kind of monkey-hold to get those staples in!
Once I stapled all of the sides, I was left with the corners. I should have taken more pictures of this part. Basically I stapled the middle flap down first and cut the excess fabric off, then (like a present) I folded the fabric from the left over the to the right side, and vice versa on the other side. Hope that makes sense! Look closely at the below picture to see
Last step was to trim all the excess fabric off so that I was left with this!
Finally I glue gunned some cord piping to hide all the staples and fabric cuts
I wanted to share the budget breakdown because I always like to have an idea of what I'm getting myself into before hand, so in case someone ever comes across this, maybe it'll give them some info that I didn't have from the get-go.
Budget Breakdown:
* 2 side tables - $10
* 2 pieces of 3" High Density Foam cut to size - $45
* 2 yards of fabric - I had a gift certificate to Tonic Living so it was free, but it would have been $32
* 2 yards of batting - $8
* 4 cans of Rustoleum Spray Paint! - $30
* cord piping - $8 for 14 feet
Total price per bench = $66.50 each, but since the fabric was bought with gift certificates, only $50.50 came out of my pocket for each bench.
Not quite as cheap as I had imagined, but on the other hand I think I would be hard pressed to buy something new like these, that will go perfectly with the colours I want for less than $50. Or maybe I'm just trying to make myself feel better?? One thing I'd do differently next time would be to save a few bucks by buying less thick High Density Foam, maybe 2 inch or less, depending on the project.
Another thing I learned: spray paint does not give half the coverage I had expected it to! I had to buy 4 cans! I only ended up using 3 and a tiny bit of the forth, but somehow I originally thought I'd be able to get by with one can. ha! I even bought the 2x the coverage Rustoleum stuff. Maybe I'll try regular paint next time.
So there you go, from beginning to end, how I brought these side tables to new seating for our main floor! If you're trying something like this yourself and need anything clarified, feel free to put it in the comments or send me an email :)
Linking up to:

Have you ever DIY'd yourself some benches? Did you learn anything along the way that you'd wished you'd known before hand?


I love the fabric that you choose for these tables. Also a budget breakdown helps a lot for enthusiastic DIYers before they jump into new project. Recently found your blog and looking forward to your many more projects in the future. New and happy follower and please do visit my new born blog @ http://isawiheardisaid.blogspot.com/
ReplyDeleteHi!
ReplyDeleteI just wanted to let you know that your post will be featured later this evening on Show and Tell Saturday #3 on Sassy Little Lady! Have a great day!
Kathie
http://www.sassylittlelady.com
Thanks Kathie!
ReplyDelete